In order to complete our video we needed to utilize the schools media equipment.
I have listed and spoke about each item below:
Item 1: Camera
The most important part of our filming stage was of course the video camera. It allows us to capture our shots in high definition digital quality. The ease of access and usability of the cameras made them a pleasure to film with, plus they never ran out due to the use of a battery charger which was a life saver when it came to filming the next day. Transferring footage was also made much easier, thanks to the use a media import cable.
Item 2: Import cable (Mini USB)
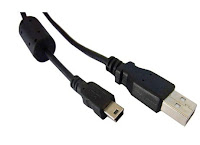
When it came to editing the footage we needed a way of getting our work onto the mac computers. Thankfully the school provided us with media import cables, they helped us out alot however they weren't without fault. At the time the macs we were using, had been updated to a new operating system, called mountain lion. Unfortunately this operating systems was having problems communicating with the macs which meant that some data transferal processes took longer to achieve and therefore ate into our groups editing time.
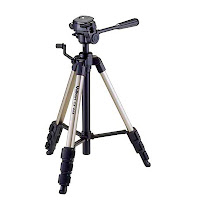
Item 3: Tripod
This three legged life saver really made filming steady shots a dream. When we initially went out to film our location scouting video, we found that alot of our shots were rocking and were not still. However, after some deliberation over what the cause of this may have been we deduced that it was the fact that the tripods had not been fastened on properly. Thankfully this problem was fixed and the shots are looking much better now.
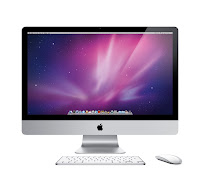
Item 4: Apple Mac
This was the epicenter of all our groups work. Everything we created from digipack to video was made on here. With its intuitive editing software (Final Cut) to the Firefox application, these computers made putting together our media product quick and easy to do.
Item 5: Studio Lights
In order to control the lighting in the performance part of our video we felt it appropriate to utilize the schools lighting rig. They have two big spotlights each with adjustable stands. We hop these lights will help add an element of polish to our music video and make it look more professional.
Item 6: The software
Although they are not actually physical items, I believe that the software we are currently using to create this video is very important, the most prominent pieces of editing and formatting software we have used would be the video editing program, Final Cut Pro. Final Cut allows me to take my footage and cut it together easily and intuitively allowing me to create a professional and polished piece with little difficulty. The second useful application is of course Firefox (I will go into this in further detail in a future post) the internet or more specifically Firefox has allowed me the opportunity to not only write these blog posts but also research and develop my understanding of the music industry and the conventions of the Hip Hop music genre through such sites as YouTube.


